TidBITS#1168/02-Apr-2013
Meanwhile, back in the real world, Josh Centers explains how Apple has updated Find My Friends to provide customizable geofences, Marshall Clow reviews the Sydnee device charging station, and Adam Engst passes along suggestions for both preventing Word document corruption and fixing it if it happens. Glenn Fleishman anchors the issue with a look back at his history with cameras, starting with a Canon AE-1, moving on to the first Kodak DCS 100, and ending up with the Sony NEX-6 mirrorless camera. Notable software releases this week include Final Cut Pro X 10.0.8, PDFpen 6.0.1, and ChronoSync 4.3.7.
Find My Friends Gains Customizable Geofences
Apple has updated its free Find My Friends iOS app to version 2.1, providing “a new UI to search for and set location-based notifications.” Location-based notifications, which alert you when a friend enters or leaves a particular location, aren’t new, but now you can specify the radius around a location, making the feature more forgiving when locations don’t match addresses perfectly and providing advance warning of arrivals. (Of course, for this to work at all, you must have been given permission to track your friends’ locations, either permanently or on a temporary basis — see “I Get by (and a Lift) with a
Little Help from Find My Friends,” 1 February 2012.)

To set a notification location, tap one of your friends in the Find My Friends list, and tap the Notify Me button. You can then specify a location: your friend’s current location, a different position on the map, or a location found by searching in the field at the top. (To change the map position, drag the pin indicating your friend’s current location to the desired spot, remembering that you can pinch to change the zoom level of the map.)
Once you’ve selected a location, note the purple circle that appears around the pin that marks the spot. New in Find My Friends 2.1 is a purple button that you can drag to change the radius of the notification area, with the size of the radius shown. (We presume the units match your country’s preferred measurement units. Unfortunately, it’s not smart enough to switch from feet to miles as the circle grows beyond the point where feet make sense.) After you click the Done button, you’ll be notified when your friend next enters or leaves that circle.
Being able to customize the geofence radius like this lets you draw a wide circle around your home to notify you, for instance, when a friend will arrive soon. Or, you could draw a wide circle around an airport at which you’ve just arrived so you could be notified enough in advance to look for a friend who’s picking you up curbside.
Sydnee Reduces USB Charging Cable Clutter
While at Macworld/iWorld this year, I stopped in at the booth of accessory maker Kanex. Last year, their featured product was the Sydnee (sid•née), a four-device iPad/iPhone charger, but I didn’t give it much thought at the time. This year, though, the image of the eight different USB devices and their tangled charging cables strewn across my desk came to mind, and I decided to see if the Sydnee would bring order to this mess.
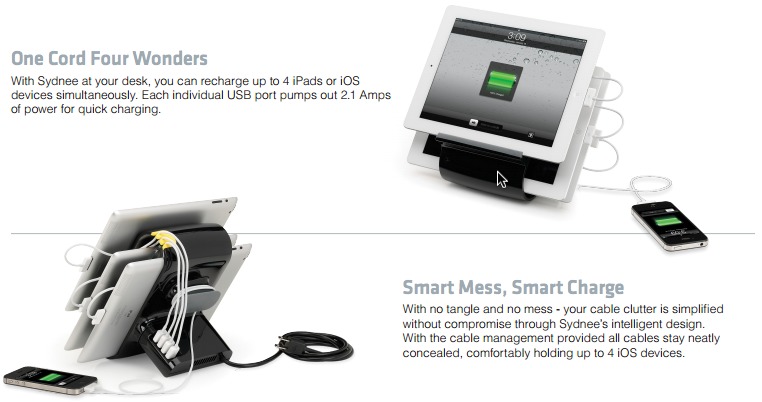
The Sydnee is a plastic stand that holds three tablets or smartphones with a power supply that powers four USB ports. The ports carry only juice; there is no way to connect the Sydnee to your computer to transfer data. That would have been more problematic in the days before iTunes Wi-Fi syncing, but today it doesn’t cause any consternation. All four ports are 2.1 amp “high power” ports, so they can charge an iPad and fast-charge an iPhone.
Setting up the Sydnee is simple; you plug it in, and then place your devices on the stand. It comes with three 16-inch (40-cm) standard USB-to-dock connector cables, which is helpful, but you’ll have to provide your own Lightning cables if you have an iPhone 5, iPad mini, or fourth-generation iPad. Similarly, if you have a Kindle or other device that can charge from USB, you’ll have to bring the appropriate cable. These cables plug into four USB ports on the back of the Sydnee. The odd mismatch between slots and cables means that one device has to sit on the desk next to the Sydnee.
Physically, the Sydnee’s front-facing shelf holds one device, and a pair of angled slots sit behind it, for sliding in two additional devices. The slots are wide enough to hold an iPad, even in most protective cases, though something like the iBallz probably won’t work. A yellow plastic cable router on the back of the Sydnee, coupled with a knob around which extra wire can be wrapped, helps keep the cables from getting tangled. Still, I recommend using short cables when possible to keep the clutter to a minimum.
I was able to use the Sydnee to reduce the clutter on my desk significantly, retiring four different USB charging bricks, and freeing up three power strip ports (after plugging in the Sydnee). My iPad and iPhone sit on the front bracket and the desk in front of the Sydnee, respectively. The two lesser-used tablets (Google’s Nexus 7 and the Samsung Galaxy 10) slide in behind the iPad. This arrangement also lets me watch video (now that it is almost baseball season) on the iPad while it is charging on the Sydnee.
The only annoyance is with the Galaxy 10. Its charging port is located on the long side of the tablet, rather than on the short end, where the Sydnee expects it to be, focused as it is on iPads. This means that getting the Galaxy 10 in and out of the slot in the Sydnee is tougher than it ought to be.
This minor nit aside, the Sydnee has been a big win. Though made entirely of plastic, it seems to be well constructed, and I have no worry about it breaking or my devices falling out. At $149, the price is a bit steep, but Amazon and other online retailers sell it for closer to $130. Nonetheless, if you have significant cable clutter resulting from needing to charge several USB devices every day, the Sydnee might be worthwhile.
Avoid and Fix Word Document Corruption
The main reason we switched from Microsoft Word for the Mac to Apple’s Pages for writing Take Control books was that Pages has support for EPUB export, and its PDF export was superior to Word’s. Another small reason for the switch was concern with occasional document corruption, which would always hit at an inopportune time. Since our documents were long and complex, with some breaking the 200-page mark, we learned to avoid certain Word features.
For example, we found that automated cross-references often caused corruption in our Word (.doc) files, and we eventually banned their use in Take Control manuscripts. We also developed specific ways of working to reduce the impact of a corrupted document. Before opening a file, each of us would make a copy in a separate folder, and increment a version number in the filename, making it easy to revert to a previous version should corruption crop up.
Even though Word document corruption is no longer a concern for our production process, I noticed that a recent discussion on the Office for Mac forum offers two useful pieces of advice for those who do worry about these problems: a list of best practices for avoiding corruption from MVP John McGhie and a technique for removing corruption if it happens.
John’s best practices include:
- Always run the latest version of Microsoft Office — John says that Word 2011 won’t necessarily even run on OS X 10.8 Mountain Lion without all the latest updates. To that I would add that it’s always worth waiting a week or so on updates, since quick follow-ups to fix newly introduced bugs in large software packages are becoming all the more common.
- Never use Track Changes. John is adamant about this, but it’s something I’d never heard before. We always used Track Changes, it being one of Word’s most useful features for collaborative editing, but the only problem we ever associated with it was sluggishness in documents with extensive tracked changes. Instead, John suggests relying on Compare Documents after the fact (find it in Tools > Track Changes > Compare Documents), which gives the same result safely (though you may find it more difficult to work with — we certainly did). For what it’s worth, we rely heavily on Track Changes in Pages too, and haven’t seen corruption issues there.
-
Don’t apply direct formatting (bold, italic, font changes, etc.). Instead, define named character and paragraph styles and rely entirely on them. I’ve not heard this advice before, but it makes sense, given how Word stores formatting information in paragraph marks following each paragraph and at the end of the document. Better yet, a properly styled document is much easier to work with if you want to make wholesale style changes or import it into another application, like Adobe InDesign. We relied almost entirely on named styles in Word, though we applied some direct styling, like bold, by hand.
-
Never use drag-and-drop for editing, and instead rely on cut and paste. John notes that he has trouble avoiding drag-and-drop editing, since it can be extremely convenient, and it’s a shame that such direct manipulation can cause trouble.
-
Use only the modern .docx format, and save older .doc files to .docx. The XML-based .docx format can describe and store aspects of a document that are impossible in .doc, so saving in .doc format can remove information from your document. We were doing this “wrong” too, because we worked with too many people who hadn’t upgraded to versions of Word that could use the .docx format. Nowadays, there’s little excuse for not using .docx.
What if your Word document is already showing signs of corruption? A technique called “doing a Maggie” (named for Margaret Secara from the TECHWR-L mailing list, who first publicized the technique) can help. Follow these steps:
- Create a new, empty document in the .docx format.
-
In your corrupted document, display paragraph marks (¶); there’s usually a button you can click to do so, or try the Command-8 shortcut.
-
Click at the very beginning of the corrupted document to set the insertion point there, scroll to the end of the document, hold down the Shift key, and click again just before the last paragraph mark in the document. (Various document attributes are stored in that last paragraph mark, so it’s a place where corruption can lurk.)
-
Copy the selected text, switch to the new document, paste the text, and save with a new name.

If that doesn’t work, particularly with a long document, make a backup and then try copying just the first half of the corrupted document out to a new document. If that new document seems fine, copy subsequent halves of what remains in the corrupted document, until you isolate the problem. (If the problem still exists, try the other half first.) At that point you can step back, extract large portions of the original document around the corruption and reunite them in a new document. The concept here is the same as the old “binary search” method of isolating extension conflicts in the classic Mac OS — turn half of the extensions off, and if the Mac boots properly, enable half of the remaining extensions, repeating as necessary
until the culprit is found.
In a worst-case scenario, where these techniques don’t help, we’ve sometimes had luck with saving as RTF, and then opening that document and converting the RTF file back to Word format. Some aspects of the document may be lost, but if it’s either that or saving as plain text and losing all style information, RTF is the lesser of the weevils.
My Camera History: Canon AE-1 to the Mirrorless Sony NEX-6
I loved my Canon AE-1. I still have it somewhere. But because it uses analog film, and since I more or less gave up on shooting onto silver-halide stock in the late 1990s, it has been tucked away in a box on a basement shelf. Since then, I’ve used a series of inexpensive digital cameras to document life and professional events, and to illustrate articles. But you know what? In that time I haven’t felt the same joy of photography that I had when shooting with the AE-1.
A new camera, part of a new approach to digital photography, has made all the difference. I’ve recaptured some of that ecstasy of freezing a moment in time, now in bits instead of chemistry. (Photo below from an AE-1, taken in 1989.)
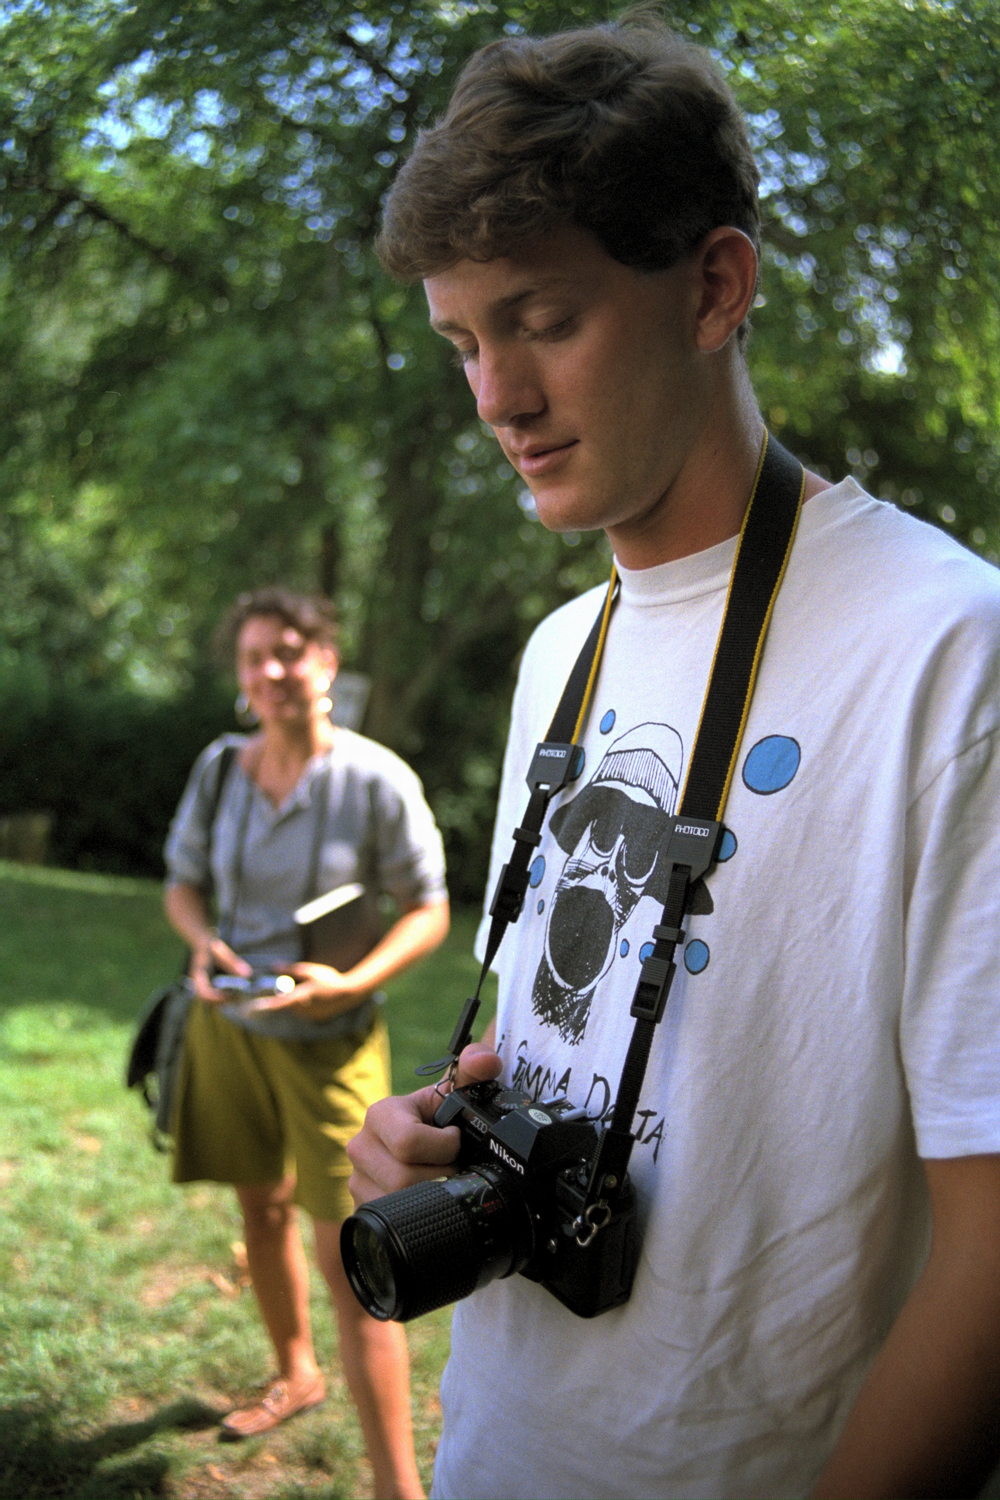
Indirect Viewing — Part of my long delay in finding a digital camera that matched my aesthetic desires was simple cost. Decent analog film cameras, especially purchased in good used condition, used to be cheap. I believe I paid about $200 for my AE-1 and a good zoom lens at 42nd Street Photo in New York in 1989. It was a single-lens reflex (SLR), which was typical for all cameras with interchangeable lenses and good optics.
In an SLR, the image passing through the lens is reflected at a 45° angle by one mirror behind the lens pointing upward to a complicated prism behind the viewfinder. The image in the viewfinder is thus exactly what the lens sees and what will be exposed onto film. When you depress the shutter-release button, the mirror behind the lens flips out of the way to allow photons to hit the film stock. It’s a clever trick. This mirror apparatus was adopted in digital SLRs (DSLRs), too.
In contrast, snapshot cameras had a separate, low-quality viewfinder lens that was offset from the main lens, making the preview in film cameras accurate from a distance, where the lines of sight converged, but terrible at close distances. If you ever wondered why you inadvertently cut off the top of someone’s head taking a snapshot, now you know. Inexpensive digital cameras used — and some still use — optical viewfinders or omit a viewfinder in favor of a camera-back LCD view through the main lens.
I’ve had a long experience with DSLRs, as long as nearly anyone on the planet, due to a stint at the Kodak Center for Creative Imaging, a digital art and production teaching center on the coast of Maine in operation in the early 1990s. Kodak headquarters in Rochester, New York, sent us the very first production model of the $25,000 Kodak DCS 100, which was a Nikon F3 camera with a low-count, high-quality CCD array where the current film frame normally went. The array was attached via a cable to a shoulder-slung external battery and hard drive that weighed about 15 pounds. But it could store 100 or so very decent pictures, and the camera used standard Nikon lenses. (You can read my account of the camera at The Economist, written around the time of Kodak’s bankruptcy filing in early 2012.)

That experience may have spoiled me. It was quite a few years before a quasi-affordable, all-in-one DSLR appeared, and it still cost many thousands of dollars. As with the DCS 100, the market was a slice of professionals (and crazy amateurs) for whom shooting directly digital and bypassing film development and often scanning was worth the cost. Such photographers had already invested thousands of dollars in lenses that worked with a specific line of camera bodies from a single manufacturer. This
category included sports and news photographers and, eventually, event photographers on cruise ships and at cheerleading matches, to name a few. The expense of fast darkroom work coupled with the ability to preview and reshoot immediately justified the value through reduced costs and increased sales.
Rinky Tinky, but not Stinky — Yours truly was neither a professional nor made of money. I moved from photography and graphic design into book editing and writing and then into Web design, programming, ecommerce, and conference coordination. None of these justified a $5,000 camera (or even a less-expensive DSLR as they gradually dropped in price in the noughties). Then I had one child and another, and I didn’t want to be one of those parents lugging around a camera and a collection of lenses, focused more on capturing the event for future reference than carrying my children and being in the moment. I didn’t think my back could support both, either.
So I bought, as many people did, a series of not-too-expensive cameras designed to match snapshot quality or better, almost all of them from Canon. They cost between $200 and $500, which has always seemed like the sweet spot for an electronics maker. At $500 or less, people may be able to justify a purchase for fun. Above $500, and you have to be a prosumer — someone who takes a professional interest in gear but doesn’t make a living from it. (There are many camera prosumers now, based on the number of purchases of high-end DSLRs that far outstrips the professional user base.)
The troubles with snapshot digital cameras are manifold. The automatic settings produce a decent result most of the time, but rarely a great one. The depth of field — the area in focus between two hypothetical planes perpendicular to the direction you’re pointing the lens — is often locked at an extremely deep range or even “infinite” to ensure that pictures are in focus. Lens quality is middling to good, but lenses are rarely interchangeable. Fast shutter speeds are often not available or add enormous amounts of noise because the camera can’t record light for large depths of field fast enough except in bright sunlight. Manual adjustments may be available, but require so much button pushing and fussing as to be too much
trouble except in studio conditions. Sensor sensitivity is relatively low, making indoor shots impossible without a flash. The built-in flash produces very hot, blown-out images and has a short range.
There’s also a slight but noticeable lag between depressing the shutter button and the camera’s electronics capturing the image. That lag has diminished enormously on the low end over time to a point where it’s almost, but not quite, gone. Richard Benson, former dean of the Yale School of Art and a MacArthur Foundation “genius” grant recipient, once said that the lag in digital cameras broke the compact that had existed since the dawn of photography: you’re capturing an image at the exact instant you push the shutter-release button.
This makes snapshot cameras great for those who want a consistent and reliable result whenever they whip a camera out, and for kids. My wife and I gave our kids hand-me-down and used cameras starting when they were 4 and 6, and despite smudges on the tiny lenses, they could take photos without much fuss. (Cameras purpose-built for kids are horrible, and it’s better to get a cheap or used one and a neck strap than deal with the ridiculous interfaces and high prices of ostensibly ruggedized and “easy” cameras for kids.)
The last of these in the snapshot series I purchased, partly on the recommendation of fellow TidBITS editor Jeff Carlson, was the Canon PowerShot G11 for exactly $500. Jeff was writing an updated book on the G11 and G12 models for Peachpit Press, and although he has been a DSLR shooter for a while, his experience with those cameras convinced me that I could bump up a bit. It also accepted lens extensions, such as ones for wide-angle and macro shots. And it was a significant improvement in terms of image quality and manual control, as well as for indoor photography. I shot with it quite happily for a few years.
I longed for more, but my pocketbook didn’t agree unless I had a business purpose for it. However, as my children aged and needed to be picked up less (I can hardly carry my older son now), giving me both hands free more often, I grew more interested in a new breed of cameras that I thought might bridge the cost and form factor divide that had kept me on the low end. I also won two episodes of Jeopardy, and was authorized by my partner in family finances to live a little, and buy a model of a new breed of camera — the mirrorless camera.
Breaking the Mirror — Mirrorless cameras have many of the attributes of both high-end and low-end cameras. The name itself explains what they’re about: the DSLR’s mirror has been removed. Instead, a high-quality viewfinder reproduces precisely what the image sensor sees. The same is true for the LCD in the camera’s back. But the quality of the optics and sensors is typically nearly or every bit as good as more expensive cameras.
Removing the mirror has four associated benefits. The camera body is less deep, because it doesn’t need the apparatus to flip the mirror. Removing that mechanism means one fewer part that can break and reduces the amount of dust that can get into the lens system. The camera is lighter. And the cost is lower, sometimes by several hundreds of dollars, than a similar DSLR camera from the same maker.
The biggest downside is the sensor. Because the lens is closer to the sensor, the area exposed has to be smaller in area to leverage the existing interchangeable lens manufacturing infrastructure. Requiring a different lens diameter and internal workings wouldn’t make such cameras cheaper!
In practice, that’s not that big a deal, because today’s sensors capture more megapixels than most people ever need, and a smaller sensor is just fine. The most common sizes are Four Thirds and APS-C, although even smaller sensors are used in some cameras. (The growth in megapixels captured doesn’t precisely correspond to an improvement in quality. It’s a marketing issue that’s taken over from the aesthetic and technical benefit. Makers could use extra sensors to produce better final images instead of larger ones, or focus on higher-quality sensors with lower pixel counts. Charles Maurer’s “Horsepower & Image Sensors” from 15 December 2007 offers a more detailed explanation.)
The decrease in body depth also means that the length of a 35mm-style DSLR lens (like a 25mm wide angle or 100mm telephoto) has to be multiplied by a factor from 1.3 to 2.7 to produce an equivalent for those familiar with conventional lenses. If you’re new to mirrorless cameras and have no DSLR experience, you may also experience some confusion if you move among different camera types that have different factors.
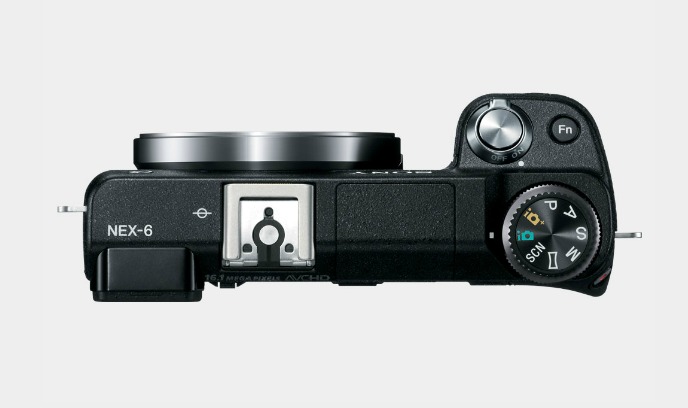
Sing, O Photographic Muse — Jeff was again my Virgil, guiding me through the nine levels of camera marketing hell until I emerged with a divine choice: the Sony NEX-6. It’s similar to the NEX-7, but has a lower-pixel-count sensor and costs about $150 less. With a 16mm-50mm (equivalent to a standard 24mm-75mm) power zoom with in-lens stabilization, the price before tax was about $1,000. (Thanks, Alex Trebek!) I added a compact case, a spare battery, and a UV filter (to avoid scratches to the lens proper) for not much more.
The change in shooting was remarkable. The Sony NEX-6 feels closer to my old Canon AE-1 than any camera I’ve owned, and its compact size and light weight reminded me more of that model than any DSLR I had tried in the interim, too. While it has a slightly wonky interface, the NEX-6 lets me easily flip through which variables I want to control and which I don’t. It has the feel of driving a hypothetical manual/automatic/autodriving hybrid car, where one could switch on demand between power and unassisted steering and the full control of a manual transmission and the joy of a well-built automatic one — or let it drive entirely if you needed a nap. It allows me to take over as I wish instead of limiting me or turning it all over at
once.
The focusing controls offer a prime example. As with most cameras, there’s an option to focus manually or automatically. The zoom lens has two outer controls on it: a curved switch on its barrel that works all the time, and a manual focus ring on the end of the lens that works as a zoom control when automatic focus is turned on. But the mixed AMF (advanced manual focus) mode gives the best of both worlds. Autofocus engages until you press the shutter button down slightly to lock in a setting. Now the focus/zoom ring on the lens switches to focusing, and you can modify the focus from the point you set — or leave it alone.
As the weeks go by, I’m finding that the camera, unlike others I’ve used, isn’t full of compromises for which I have to develop workarounds that never become second nature. Rather, the camera has enough depth and control that it is teaching me. The more I use it, the more I discover how to use it better and take advantage of ever more features.
It has already paid off in the form of dozens of photographs I’ve taken for work purposes, including a set that I shot while visiting the Jet Propulsion Lab in Pasadena, CA, for a series of Economist articles. I was given a tour of the “sandbox,” an indoor space where identical versions of the Mars Opportunity/Spirit rover type (a third sibling) and the Curiosity rover are housed to test out maneuvers when 3D computer simulations aren’t enough. Without the new camera, my pictures in that space would have been terrible. Instead, a series was used online to accompany one of my articles, and one appeared in the print edition of the magazine. It has also been
marvelous to take more vibrant, sharp, and interesting pictures of my family and friends.

One cannot emphasize too highly how much having a shallow depth of field affects the perception of a photograph. You know the effect: The background and near objects are hazily out of focus, while just the key part (often a face) is sharply defined. I have heard it explained that the reason we identify with such photos, and why they feel subjectively better, is that a shallow depth of field matches our vision, even though we don’t perceive it directly.
Look at a near object, and try not to change focus on it, but use peripheral vision to examine the focus of the rest of your vision. You may never have noticed it before (I didn’t until it was brought to my attention), and now you will never be able to un-notice it. A shallow depth of field is possible with cameras other than DSLRs and mirrorless ones, but it’s much harder to squeeze out of them.
New Love for an Old Art — I never lost my love affair with photography, but my ability to match what I wanted to achieve with what I could produce had such a large gap that I was a listless shooter for a long time. A determined and clever person could take a snapshot camera and achieve results better than I.
A strong memory from my time at the Kodak center was of Richard Benson poking at our early-generation Kodak color copier. We couldn’t get good results out of it, and used it only occasionally. He, a genius printer in both analog and digital realms, ran a number of tests and calibrations, and soon had the thing singing, making images of such vibrancy and accuracy that we goggled. There are certainly snapshot artists, too, just like smartphone artists, who can extract the best from a cheaper or otherwise limited camera.
But I’m too much of a pretender for that. I need a camera that gives me more capabilities while I learn to use it instead of letting me down whenever I need an assist, and the Sony NEX-6 is that camera for me.
TidBITS Watchlist: Notable Software Updates for 2 April 2013
Final Cut Pro X 10.0.8 — Apple has released Final Cut Pro X 10.0.8, a maintenance release with a short list of targeted fixes and improvements to the professional video editor. The update adds an option to display ProRes Log C files from ARRI ALEXA cameras using standard Rec. 709 color and contrast levels, provides support for the Sony XAVC codec up to 4K resolution, renders time-reversed clips in the background, adds the capability to use key commands to adjust Clip Appearance settings in the timeline, and enables you to view reel number metadata located in the timecode track of video files. The release also fixes an issue
where green frames were generated when using some third-party effects, resolves performance issues that occurred with certain titles and effects, ensures correct volume levels for mono audio files in a surround project export, and fixes the niggling problem of drop zones getting reset to the first frame of a video after a restart. In addition to Final Cut Pro X, Apple has also updated Motion to version 5.0.7 (with fixes for the green frames and performance issues with titles, plus a stability issue when splitting layers in the timeline) and Compressor to version 4.0.7 (removing the 1 GB file size
limit when uploading to Vimeo and fixing stability issues with MPEG-2 files and Qmaster). ($299.99 new in the Mac App Store, free update, 1.64 GB, release notes)
Read/post comments about Final Cut Pro X 10.0.8.
PDFpen 6.0.1 — Following the recent release of version 6.0 of its two PDF-manipulation programs (see “PDFpen 6.0 Adds Word Export,” 19 March 2013), Smile has updated PDFpen and PDFpenPro to version 6.0.1 with several essential fixes. The new release enables you to export Microsoft Word documents when running Mac OS X 10.7 Lion, and Preview and Quick Look will no longer be able to display a password-protected PDF saved by PDFpenPro. The update also fixes issues with importing and using Library items, ensures that PDF
portfolios and LaTeX-generated PDFs can be opened, resolves a potential hang when right-clicking in the sidebar, enables use of the Populate Scripts menu in Lion, and fixes links to PDFpenPro-specific help topics. Note that as of this writing, both PDFpen and PDFpenPro have yet to be updated to version 6.0.1 in the Mac App Store. Upgrades from a previous version of PDFpen or PDFpenPro cost $30 via Smile, but are free to those who purchased on or after 15 October 2012. If you want to upgrade to PDFpenPro from a previous version of PDFpen, the price is $40. ($59.95/$99.95 new with a 20-percent
discount for TidBITS members, free update from version 6.0, 49.6/50.3 MB)
Read/post comments about PDFpen 6.0.1.
ChronoSync 4.3.7 — Econ Technologies has released ChronoSync 4.3.7, bringing a few improvements to how the synchronization/backup application works with network volumes. The update now enables you to specify a login domain when entering a username in network volume Target Options, plus it adds logic that aids in detecting when a mounted SMB volume becomes disconnected, and changes the way file and folder information is collected from NAS volumes to prevent overloading and hanging. The release also fixes a bug where mounted local and network volumes were not ignored when scanning only local files.
Other squashed bugs include a problem where scheduled syncs would stop running after a missed scheduled sync, a hang caused by sending a notification email message after aborting a sync, and a minor problem with date conversion when no date is specified. ($40 new, free update, 28.9 MB, release notes)
Read/post comments about ChronoSync 4.3.7.
ExtraBITS for 2 April 2013
iCloud security and Core Data syncing dominated our attention last week, broken up by news that T-Mobile will finally begin selling the iPhone — in an unusual no-contract sales arrangement.
The Verge Examines Apple’s Cloud Security — Should security practices be kept secret? The Verge’s Tim Carmody suggests that Apple’s legendary secretiveness could result in worse security than if the company were more transparent about how it protects customer data. He closes with, “All the evidence suggests that much like Apple Maps or MobileMe, iCloud simply isn’t at the level of polish and performance we’ve come to expect from Apple. Security is just a symptom.”
The Reality of iCloud Core Data Syncing — The Verge’s Ellis Hamburger talked to a bunch of developers in writing this extensive article about frustrations with iCloud’s Core Data syncing features, which are necessary for apps that need to do database-style syncing via iCloud (as opposed to document-style syncing, which works fine). Syncing is hard, but Apple needs to get it right if developers — and users — are to rely on iCloud integration.
Rich Siegel Explains the Issues with iCloud Core Data Syncing — Developer frustrations with iCloud Core Data syncing have been much in the news of late, but for those who are wondering — at a technical level — what the fuss is all about, Rich Siegel of Bare Bones Software lays out what is involved with iCloud data syncing, and where developers are experiencing problems.
T-Mobile to Sell iPhone Starting 12 April 2013 — Macworld’s Dan Moren tracks down the picky details surrounding T-Mobile’s announcement that it will start selling the iPhone (the 4, 4S, and 5) in the United States on 12 April 2013. Notable facts about T-Mobile’s move include unsubsidized hardware for down payments plus monthly charges, a $50 per month unlimited plan (for talk, text, and data, with a 500 MB cap on 4G data, which includes tethering), and simultaneous voice and data (offered by AT&T currently, but not Verizon or Sprint).